When removing the scratches from a helmet visor as a DIY project, you must get it right. To this effect, it’s vital to learn how to remove scratches from helmet visor. To remove scratches from a helmet visor, certain steps are required. These steps involve sanding, washing, polishing, wiping, and drying the visor.
If you intend to learn the proper way to go about this, find the methods we’ve discussed below. Also, further, along with the article, you’ll discover more important information, such as the ways to prevent scratches on helmet visors. Keep reading to know more about this topic.
Key Points:
- To remove scratches from a helmet visor, certain steps are required. These steps involve sanding, washing, polishing, wiping, and drying the visor.
- The first thing you’d want to do for light scratches is to know the kind of scratch you’re dealing with. Afterward, you’d need to employ a remover and rub it on the surface of the visor.
- It’s possible to remove scratches from helmet visors at home. Some methods through which you can achieve this include employing a glass cleaner, using metal polish, etc. Additionally, you can include the use of furniture polish and the restoration kit of a headlight.
- Preventing scratches on the helmet visor is one of the ways through which you can extend its longevity. This is valid regardless of the underlying durability of the helmet.
Can You Remove Scratches From Helmet Visor At Home?
Removing scratches from a helmet visor at home is quite possible. However, following the right techniques is crucial to doing this correctly. Some methods through which you can achieve this include employing a glass cleaner, using metal polish, etc. Additionally, you can add furniture polish and the restoration kit of a headlight.
Let’s address these methods in more detail for a better understanding:
The Use of a Metal Polish
It’s ideal to use a metal polish on a visor if it’s made of acrylic. However, you should be aware that the visor will not appear as new. Nevertheless, it’ll still be worth the effort. Don’t attempt to use a metal polish for a polycarbonate visor, as it’ll only be a waste of time and energy.
Glass Cleaner can work too.
There are several glass cleaning agents available on the market. However, not all of them are suitable for cleaning a helmet visor. For this purpose, you may need to use a product like a kind of paste for cleaning glass surfaces like windows, visors, etc.
The Use of Furniture Polish
Using furniture polish for mild scratches works pretty well. It’s also a great choice for removing scratches off helmet visors. However, if the scratch is a lot deeper than mild, you may have to replace it completely.
Employing the Restoration Kit of a Headlight
These restoration kits are specifically designed for the headlights of vehicles, particularly if you wish to replace them. Nevertheless, these kits are also suitable for tackling scratches on helmet visors. Though it’s not always ideal to employ these kits for a helmet visor. This is because they’re tough materials to use on visors. Oftentimes, using restoration kits creates clear marks and scratches on visors. In this case, it’s more appropriate to replace the entire helmet visor.
While a couple of these methods may not be the best options for tackling scratches on visors, they still make it usable for the time being.
How to Remove Scratches from Helmet Visor
There are different approaches to dealing with scratches on a visor, depending on how deep or light the scratches are. The first thing you’d want to do for light scratches is to know the kind of scratch you’re dealing with. However, you might need to start with washing the visor for a deep scratch. The steps involved in both processes are pretty simple. So, let’s discuss these steps in detail.

1. For Light Scratches
In the case of light scratches, you can barely feel them when you rub over the visor with bare hands. Nevertheless, they’re apparent when you look through the visor and are oftentimes distracting when on a ride.
Here are the necessary steps to tackle this kind of scratch.
Know The Scratches You’re Dealing With
Don’t make any attempt to tackle the scratches without finding out whether or not the scratches are light. If you can only see but can’t feel the scratches, then you’re dealing with light scratches.
Get an Ideal Remover
Once you can tell that the scratches are light, the next step is to get an ideal remover. For this, you might want to consider getting a polish brand that’s less abrasive. Additionally, using toothpaste works well for removing scratches. However, you can’t trust all toothpaste for this purpose. You’ll need to do a test run on a small portion of the scratch. This is necessary to know the reaction of the paste with the scratches.
You can opt for whitening toothpaste, as it’s somewhat relative to car polishes due to its rough state.
Rub It –
Apply some quantity to the affected areas and rub it using a soft wet microfiber towel. The fading of the scratches is gradual. So keep up the process until there are no more scratches in sight.
2. For Deep Scratches.
The procedure is quite different when it has to do with deep scratches. The first thing you’ll observe is that the scratches are very easy to notice. Just rubbing your fingers over the visor tells you where each scratch is. Since these scratches are deep and more noticeable, they’ll require more effort to tackle. Use these steps to remove those deep scratches on the face of your helmet’s visor.
Washing
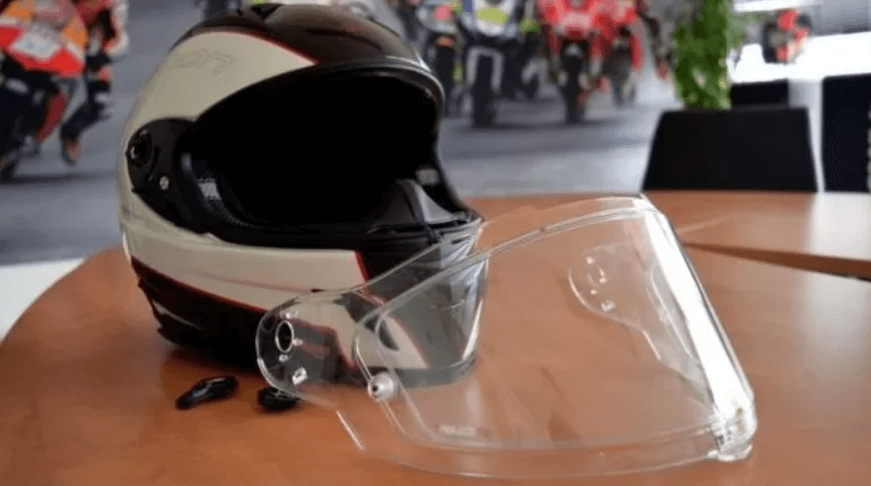
To begin, you’ll need to detach the visor from the helmet. Using a mild detergent or soap and water, gently wash the visor to free it from debris and dust. Avoid using any harsh cleaning agent, as it can harm the visor’s surface afterward.
Sanding
There are two phases in the sanding process. In the first phase, you’re looking at making the edges of scratches soft. Put a 320 grit sandpaper into agua. When that’s done, use the damp sandpaper to sand the edges until they become level.
Due to the sandpaper, you may notice some little scratches on the visor during this phase. However, they’ll clear up as you continue the process.
In the second phase of the sanding process, you’re to employ sandpaper of about 2000 grit, which is less abrasive than the initial. Now, repeat the sanding process for some minutes. To achieve a good result, carry out the sanding using a circular motion.
Polishing
Once you’ve completed the preceding step, the next thing to do is polish the visor. The sanding step must have removed the deep scratches, leaving those from the sandpaper, hence the need for the polish. The ideal polish for this step is a plastic polish of high quality. Here’s what to do:
- Apply a little quantity of polish to the visor’s surface.
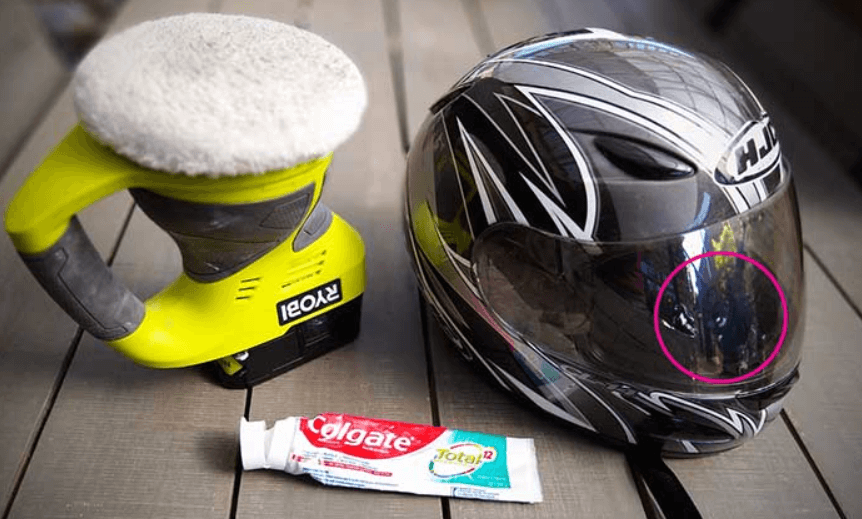
- Using a microfiber towel, buff the polish all over the visor. A power drill attachment can also work well for this purpose.
- Keep up this process until the scratches disappear completely.
Wiping and drying
The polishing stage usually leaves the helmet and visor looking foggy. To clear up this appearance, there’s a need to wipe and dry the helmet. Use a damp towel to clean the whole helmet and allow it to dry. This should make it appear new.
How to Prevent Scratches on Helmet Visor?
Preventing scratches on the helmet visor is a good way to escape the hassles of fixing or replacing damaged visors. Presently you can find several products on the market that help to shield the helmet visor from sudden scratches. Furthermore, you may also need to mind how often you touch the visor. This will help you avoid smears and tints on it.
Moreover, preventing scratches on the helmet visor is one of the ways through which you can extend its longevity. This is valid regardless of the underlying durability of the helmet, whether or not it’s a motorcycle helmet for beards. Furthermore, preventing scratches from the helmet visor relates to caring for it and the precautions you take while using it. Here are a few things you should do.
- Avoid getting too close to other riders when you’re on a ride. Doing this exposes you to shooting stones or some other debris that can damage the visor and affect your vision.
- Always place your helmet on surfaces or areas where it’s less likely to drop to the ground.
- Most visors come with an anti-fog coating that helps the rider see clearly in dusty or foggy conditions. For this to be effective, avoid riding with an open visor in dusty or foggy conditions. Doing so will build up dust on the inside of the visor, forfeiting the purpose of the anti-fog coating.
- Make sure to use a damp towel to wipe away dust and debris after a ride.
- You can employ some water and fog repellants to help shield the visor from being smeared and fogged up.
Do not place your motorcycle helmet on mirrors, handlebars, or the seat of your bike. These are a few of the most unsafe places to leave your helmet.
Conclusion
Knowing how to remove scratches from helmet visor can save you from replacement costs. Thankfully, the steps involved are pretty simple. To fix the scratches on your visor, the first thing to consider is the intensity of the scratches. That will determine the approach you’re to use. For light scratches, you’d need to employ a remover and rub it on the surface of the visor.
Conversely, when dealing with deep scratches, you want to start by washing the visor with mild soap and water. Then you can proceed to sand, polish, wipe, and dry it. Simply follow the steps above to perform this process rightly.