Helmets are worn for our protection. Especially when riding a motorcycle, they protect us from injuries that could arise from falls or head-on collisions. When worn for prolonged hours, there is a tendency to sweat. Due to the helmet’s design, the sweat sticks to the liner of the helmet.
To prevent offensive smell and itching from the helmet, you should learn how to clean non-removable helmet liner. You can do this by first getting the right cleaning agent for your helmet. Then fill a tub up with water, mix the cleaning agent and completely immerse the helmet in it. Kindly read on to find out more.
Summary:
- Following the instructions from the manufacturers is the right process to clean a non-removable helmet. Use mild detergents, soap, and baby shampoo to clean your helmet.
- To machine wash helmet liner and padding, use a temperature setting of 30℃. Make sure the whole helmet is immersed inside a big tub of water to get rid of sweat and dirt completely.
- Gently squeeze helmet liner and padding while washing helmet liner. Make sure to rinse detergent away from the helmet liner thoroughly. Only massage liner with your hand or towel to wash the dirt off it completely.
- To clean non-removable helmet liners, use anti-microbial to kill bacteria that grow in humid dark places and mold. Use only non-allergenic and non-toxic sprays for your helmet liners.
What to Do and What Not to Do When Cleaning Helmets?
Cleaning a helmet is good, but if done wrongly, it could damage the helmet. Just like every other accessory, there are some dos and don’ts associated with cleaning a helmet. So, to safely clean your helmet without damaging it, kindly follow the dos and don’ts below:
What to Do?
1. Thoroughly Clean The Inner Lining And Pads
Sweats, hair products, and dust can fade the color of the helmet lining, cause a bad odor, and generally cause discomfort when dirty and in use. For instance, drag racing can attract a lot of germs into your helmet. It is very advisable to clean your drag racing helmet immediately after use. So, apply deep cleaning on the helmet when it is necessary.
However, this helmet liner comes in two different types: the removable and non-removable helmet liner. Different deep cleaning methods apply to both. If the lining is removable, detach the lining and the pads and soak them in the water of mild shampoo, rinse and allow them to air dry. If the helmet liner is non-removable, soak it in a bucket or container of water, completely immersing the helmet.
2. Go For A Cleaner That Is Non-Toxic And Non-Allergenic
Using non-toxic and non-allergic helmet cleaners prolongs your helmet’s lifespan and helps your head against skin irritation. So we advise you to use less irritating cleaners and spray
3. Remove The Visor Or The Shield Before Soaking Your Helmet In The Water
To properly wash your helmet liner, you have to detach the liner, pad, visor completely, and shield to give your helmet a thorough wash. You can clean your visor or shield separately by using a visor cleaner, clean water, or window cleaner to clean the helmet visor or shield. Then use a towel to squeeze and dry the liner.
4. Replacement Of Straps
Almost all bike helmet straps are made to be very durable. But just in case of damage to straps, it is advisable to change it or get a brand new helmet from a motorcycle helmet shop. If the straps are detachable, get a new one, take it to a motorcycle accessories shop, or fix it by yourself at home if you are up to it.
5. Polishing the Helmet
You can consider re-polishing your helmet again if it looks faded after cleaning it. You can opt for a quality car wax to polish it for a brighter color again. But if your helmet has a matte finish, it might really not be a good idea to polish it again. Remember, polishing has to be done after the helmet has been cleaned and dried.
What Not to Do?
- Avoid any cleaning agent with Ammonia content. This will reduce the shatterproof quality of the polycarbonate.
- Don’t use compressed air to dry the liner when cleaning the helmet. This compressed air will make the fabric stretch and damage the foam.
- Avoid the use of dirty water when cleaning your helmet
- Do not wring the liner in the process of trying to dry it. It can damage the foam
- Don’t use sprays containing oil to clean the helmet visor because it can cause a blurry view on the visor.
How To Clean Non-Removable Helmet Liner?
Helmet liners make wearing the helmet comfortable. It helps keep a balance between a rider’s head and the helmet shell. Helmet liners also keep the head safe and prevent unnecessary head movement when it is securely strapped. But sweats and dust from the head can make it dirty or smell. Therefore, follow this step by step method on how to clean non removable helmet liner below:

1. Follow the Manufacturer’s Instructions on the Label
You might want to consider instructions from the manufacturers on how to go about cleaning a non-removable helmet liner by reading the instructions attached to the label. Different methods apply for cleaning the helmet liner. It can be washed using a towel or by using a washing machine. Whichever method, make sure it goes in line with the washing instructions. These instructions help you properly wash non-removable helmet liner without deteriorating their quality.
2. Infuse the Non-removable Helmet Liner in a Tub of Water
Get a big tub that can fit the helmet. Fill it with water. Make sure the whole helmet is immersed inside the water in the tub. Depending on the material of your helmet liner, add an adequate quantity of detergent or shampoo to form a solution.
Allow the non-removable helmet liner in the tub for some minutes to let the solution gradually absorb through the liner. This will aid the sweat and dirt on the liner to go off lightly. Remember to detach the shield or visor before infusing it into the water.
3. Start Cleaning the Helmet
Get a towel to start cleaning your helmet when it is appropriately submerged in the water. Beginning from the end of the loner, gently squeeze the water by pressing the towel back and forth. Helmet liners are made of very soft materials (upholstery). Thereby, you don’t need to squeeze too much. Make sure to press out the water and rinse in the solution till it is completely done. Watch for the color of the helmet liner to make sure it is completely clean of dirt and sweat.
4. Get Another Clean Tub of Water
Once you are satisfied with the color and smell of your helmet liner, get rid of the dirty water and get another clean tub of water and immerse the helmet in it. Leave the helmet liner in the water for some minutes, then get a clean towel to clean it again. Carefully rinse and squeeze the towel into the liner and water. Repeat the action until you complete the rinsing process.
5. Dry Out the Helmet Liner
After the washing process, you can either dry out your helmet in the open air, using a fan or using the dryer to blow air on it until it is completely dried. Place it on the side or back and get the air, sunlight, or air from any drying method you wish to use straight to it. Some people can add perfumes to their helmets to get them smelling nice.
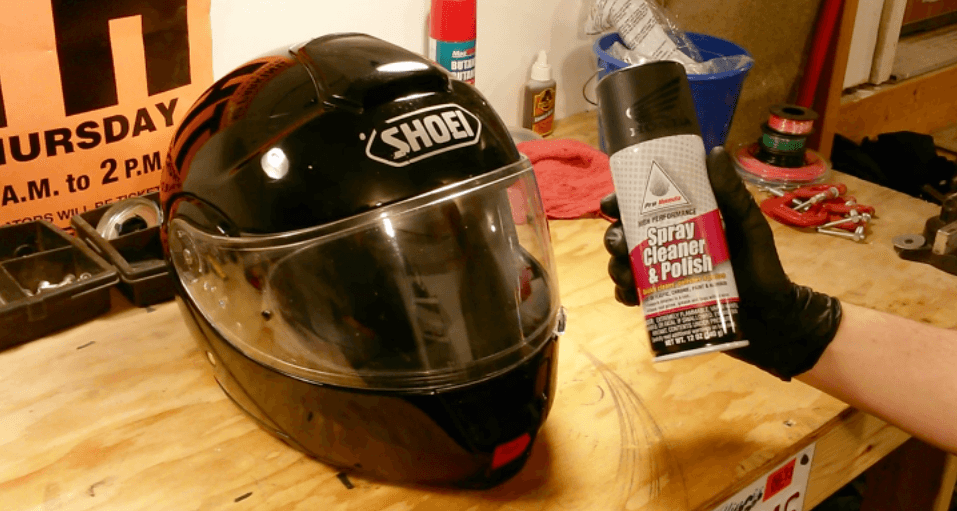
6. Using a Spray to Clean the Helmet
Going through the above step might be time-wasting and tiring. You might likely be in a hurry and decide to opt for a less stressful and time-consuming method. Then using the spray can save the day. All you need to do is get a good spray that is non-allergenic and not toxic.
Once you have sorted out the kind of spray for your helmet, simply spray the spray cleaner inside the helmet liner, rob it with a towel or a cloth, allow it to air dry for some minutes, and you are good to go riding with your helmet.
How To Clean Removable Helmet Liner?
New modern helmets can easily be detached, making cleaning the liners less tasking. Thinking of cleaning your removable helmet liner? Follow this procedure below: Get the right detergent first. One that won’t bleach or weaken the fabric of the helmet liner. The following process can help you clean your removable helmet liner.
- Mix the detergent or shampoo and lukewarm water in a bucket or tub for hand wash.
- Gently massage the liner and cheek pads with a cloth or towel till it is clean.
- Rinse the liners and cheek pads until all detergents are gone from them.
- Gently pat or squeeze the linen and towel. Do not twist the cheek pads to avoid damaging the foams it’s padded with.
- Dry it with a dryer or a fan, or allow it to air dry before attaching back to the helmet.
How to Care for a Helmet Liner?
- Know how to detach the liner when cleaning properly.
- Use only mild soaps, detergent, and baby shampoos to wash
- Do not use a temperature above 30℃ to wash the helmet liner
- Always rinse helmet padding and liner with cold water
- Allow it to dry properly after cleaning.
- Install helmet liners and padding immediately after cleaning and drying.
- Replace old and worn outliners
General cleaning of the helmet liner is the proper way to care for it. Doing this will keep it in the best condition for more comfortable rides.
Frequently Asked Questions (FAQs)
Are Helmet liners machine washable?
Helmet liners comprise high-density foam and moisture-wicking cloth. They are designed to secure inside of the helmet and act as an intermediary between your head and the helmet. Helmet liners can be hand washed and machine washed. But it is advisable to hand wash because it makes the liner last longer.
Can a motorcycle helmet be relined?
Motorcycle helmets are of different types, and so are their liners. A few of them come with replaceable liners that you can remove. Motorcycle helmets can be relined through the following steps;
Step 1: Get a new liner.
Purchase a new one that would be used to replace the old liner. Every helmet model has its customized liner. So be careful to get the actual liner for your helmet and the correct size.
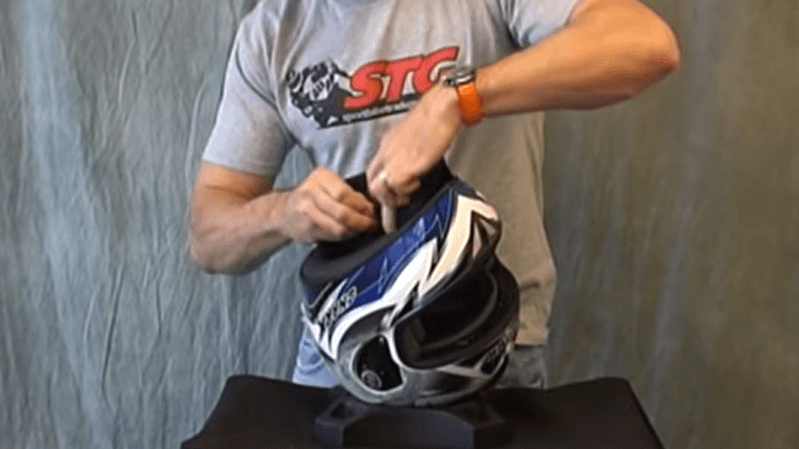
Step 2: Remove the padding
Every helmet is designed so that there is interior padding that covers the liner. This padding has to be removed to gain access to the internal liner.
Step 3: Remove the internal helmet liner
After removing the padding, you have to remove the internal helmet liner. Place the helmet upwards and pry under the edge of the liner. Then lift the helmet liner out.
Step 4: Put in the new liner.
This is the last stage in which you put in the new liner. This is done the same way you took out the old one. But in this case, make sure the padding and liner fit properly inside the helmet without movement. This will prevent safety concerns.
Can we wash the helmet with water?
We can wash the helmet with water. This is how you can clean out all dirt, stains, and odor from the helmet. To wash a helmet with water, you fill your bucket with clean water. Then completely immerse the helmet in the water and begin to wash with a clean towel but rub it gently.
Can you replace the foam in a helmet?
You can easily replace an old helmet foam with a new one. Every helmet comes with foam to give extra comfort and support to the head. They could wear off due to constant use of the helmet or from a fall. When this happens, a change or replacement is required.
Conclusion
Without cleaning, wearing your helmet for a long duration can expose you to germs. Aside from getting dusty, sweat can accumulate in the helmet’s liner. As discussed above, the helmet’s liner is designed to secure the inside of the helmet. It also creates a barricade between the helmet and your head.
If the liner cannot be removed, you need to know how to clean non-removable helmet liner. As outlined above, you can clean non-removable helmet liner by using the right cleaning agent and washing with water. Feel free to read up on more ways you can clean a non-removable helmet liner above and enjoy an odorless and clean helmet.