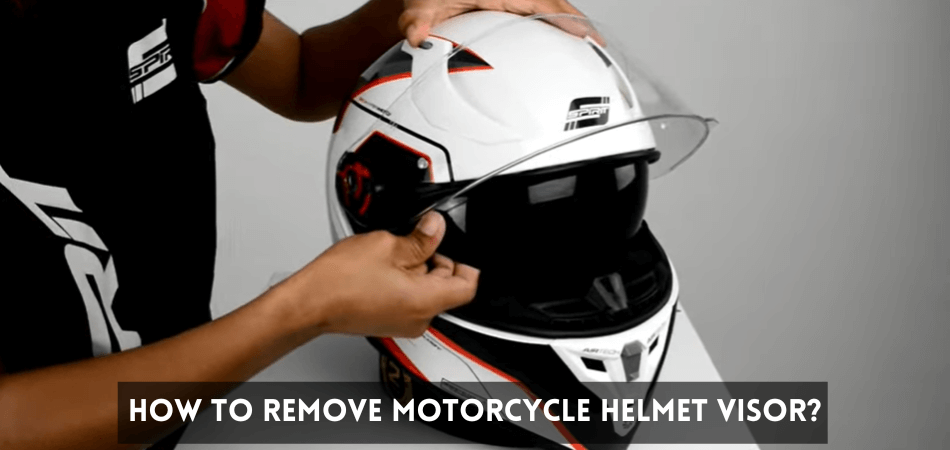
If you use a helmet, you must know how to remove motorcycle helmet visor. The knowledge will come in handy when there’s a reason to fix or replace the helmet visor due to scuffs, abrasions, or cracks. These are some factors that reduce the ability of a rider to see clearly. So, how do I remove a motorcycle helmet?
Removing or replacing your motorcycle helmet involves 3 basic steps which are preparation, removing the outer visor, and removing the main shield. Furthermore, for this process to be successful, there’s a need to employ the right tools.
In this post, we’ve discussed the simple steps on how to remove a motorcycle helmet visor. Additionally, you’ll discover how a motorcycle visor works, some frequently asked questions, and more. So, keep reading for more detailed information.
Key Points:
- It’s possible to remove virtually all motorcycle helmet visors. Also, removing a visor from its helmet begins with the clasps and catches.
- Motorcycle visors come in different brands and types. The working mechanism of these visors may differ according to the specific design of the manufacturers.
- To clean your helmet visor at home, always use plain water, a visor cleaner, or a windows cleaner. It’s not advisable to use a spray with traces of oil in it.
- It’s possible to lengthen the longevity of your helmet visor regardless of its durability. This has to do with how you care for it and your precautions when on a ride.
Can You Remove Visor From Helmet?
It’s possible to remove all motorcycle helmet visors. Moreover, these helmets have a special design that makes it possible to detach their visors. Some come with a clasp, and others with a catch just around the ears region. Removing a visor from its helmet begins with the clasps and catches.
Furthermore, the various helmet brands and types have special visors. In certain helmets, there’s only a single visor. You can find up to two different visors for some others, the tinted and the clear, as they come. You can find such visors in most helmets for hot weather.
How Motorcycle Visor Works?
Motorcycle visors come in different brands and types. The working mechanism of these visors may differ according to the specific design of the manufacturers. Although they work differently, there’s still a connection in the idea behind them.
- All visors are designed to shield the eye from flying objects.
- Having a visor on during a ride helps to shade the eyes from the brightness of the sun.
- While that is valid, the working process of certain visors involves a little push of a button.
- For others, you would need a few tools like a screwdriver to detach the visors from the helmets.
- Furthermore, a motorcycle visor works by shielding the eyes from raindrops while helping you to get an uninterrupted view. This is particular to visors with water-resistance features.
- Also, for riders who wear goggles, having the visor keeps these goggles in their state.
Tools You Need:
- You’ll need a screwdriver in most cases
- Substitute visor
- The helmet of the visor that needs to be replaced
- Some piece of towel or rag for cleaning the helmet. However, this isn’t compulsory.
How to Remove Motorcycle Helmet Visor?
The need to remove a helmet visor could arise due to several instances. An example of which may be a result of damages incurred from a sudden impact or an accident. At such times like this, it’s only appropriate to replace the visor in place of getting a new helmet. To do this correctly, you’ll have to understand how to remove motorcycle helmet visor for the two major helmet variants.
Half Face Helmet:
Removing the visor of most half-face helmets is quite straightforward, and as such, you won’t need special tools. It just takes a simple click or shift of its lock. Simply move the lock on the left and the right toward you. This action unlocks the helmet visor to enable you to take it out. Simply lift the visor when that is done.
Full Face Helmet:
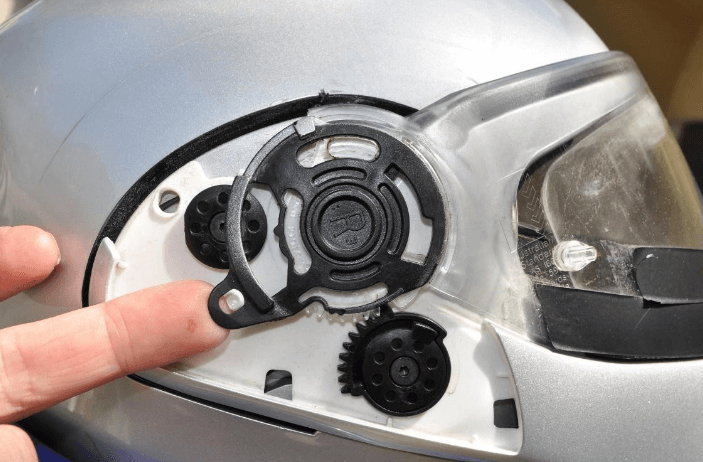
- Using a screwdriver, unscrew both screws on the sides of the helmet to remove the outer visor. Once the screws are completely unscrewed, the visor will come off easily.
- Hold the inner safeguard firmly and draw it downwards on both sides.
- Take note of the cover placed on the pivot system (for a pivot system helmet). You can simply open this cover with a small screwdriver and pull out the little spring. Doing this will detach the inner visor from the pivot system.
- Once this is completed, you can now clean the visor or fix it if it’s damaged or replace the visor.
How to Fix Helmet Visor?
One of the most common issues bikers face daily is a broken visor. Many things are responsible for a broken visor. Some instances may include dropping the helmet to the ground by accident, pressing hard against the visor, or due to a crash. If any of these instances should occur, the next and most ideal thing you may want to do is put the visor in order. However, if the damage is irreparable, you will buy a new visor.
No matter the visor you’re dealing with, employing some easy tricks could help you put things right. The visor will not be as good as new. However, these simple tricks might just make it usable again. So, let’s get right into them.
- Firstly, use any of the available glue (super or instant) on the visor. To achieve the right result, you should get a thin glue and apply it with little cotton material. The purpose of the thin glue is to put the visor in one piece while holding it strongly together.
- It’s important to detach the visor of the helmet before beginning this process. When that’s done, fix the small cotton pieces in between the fragmented parts of the damaged visor. Ensure the cotton pieces are not so dense, as that will affect the bonding of the broken parts. Moreover, with low bonding comes less visibility.
- Drop some glue over the edges of the fragmented pieces and apply pressure on them to make them stick together. Make sure to do this quickly enough to beat the drying time of the glue.
- You need to keep the pressure on for a minute or two and cut off the bulging cotton pieces afterward. You can also use transparent adhesive tape on the joints if you so desire.
When carrying out this process, it’s essential to work with care, as it can turn out to be a bad idea. Being careful comes in the area of applying the glue. You don’t want to drop it on the face of the visor or your clothing in the process.
The second thing option is stitching the visor. You probably imagine how that’ll look. Although seeing through the thread isn’t going to be nice, this provides a more solid result. However, employing a strong thread for this technique is a must for the result you wish to achieve. One of the threads we’re talking about here is a safety wire.
- Simply run the stitching through the cracked portions of the visor
- Form a knot at the helmet visor base
- Use tape or glue to seal the knot. This is so that it doesn’t hurt you by accident.
The last trick here involves using duct tape. Put the visor in one piece by sticking it with the duct tape at the bottom and the top. Although you won’t get the total strength of the visor, it’s a good way to hold it together. However, it’s not ideal to use this technique in terms of safety.
When to Remove the Motorcycle Visor?
Removing the visor of your motorcycle helmet allows you to maintain it with ease and in the right way. When it comes to cleaning or fixing the visor, singling it out gives you proper handling. There are more reasons also; let’s get right into them.
Cleaning
Oftentimes, the visor of a helmet can ensure some scratches or residue from previous use. At times like this, it’s most appropriate to detach the helmet’s visor. Doing this allows you to easily reach difficult areas of the visor, such as the edges. Moreover, getting to such tight areas wouldn’t be so easy if the visor was still attached to the helmet.
Proper Maintenance
Maintenance, in this case, refers to a quick check of the entire helmet, which includes the visor. During this process, you might need to detach the visor from the helmet to check for possible cracks or losses. Moreover, removing the visor in this scenario gives you better access to more areas of the helmet.
Easy Fixing/Replacement
If your helmet’s visor is broken or cracked, probably due to an accident, you might feel the need to fix or replace it. Fixing or replacing the helmet visor is only possible when you can detach it from the helmet. You can consider this case a good time to remove the visor of your motorcycle helmet.
In a worst-case scenario, you might need to change the entire helmet, especially if it’s broken due to a mishap or an accident. It’s always important to put your safety before anything else.
Frequently Asked Questions
How to Protect Motorcycle Helmet Visor?
It’s possible to lengthen the longevity of your helmet visor regardless of its durability. This has to do with how you care for it and your precautions when on a ride. Consider the following things below to protect your motorcycle helmet visor.
- Avoid getting too close to other riders when you’re on a ride. Doing this exposes you to shooting stones or some other debris that can damage the visor and affect your vision.
- Always place your helmet on surfaces or areas where it’s less likely to drop to the ground.
- Most visors come with an anti-fog coating that helps the rider to see clearly in dusty or foggy conditions. To be effective, avoid riding with an open visor in dusty or foggy conditions. Doing so will build up dust on the inside of the visor, forfeiting the purpose of the anti-fog coating.
- Do not place your motorcycle helmet on mirrors, handlebars, or your bike seat. These are a few of the most unsafe places to leave your helmet.
Are All Motorcycle Helmet Visors The Same?
All motorcycle helmet visors are not the same, as these visors are designed for different needs or purposes. Depending on what you want or your riding preferences, you might have to choose a particular visor over another. Generally, there are two main kinds of visors: built-in and detachable. Purchasing any of these visor types depends on the rider’s needs and daily tracks.
How Can I Clean My Helmet Visor At Home?
To clean your helmet visor at home, always use plain water, a visor cleaner, or a windows cleaner. It’s not advisable to use a spray with traces of oil in it. Such a spray will leave your visor having smeary films on its surface. Moreover, having such lines on the visor reduces your chances of having a clear view on a ride.
Conclusion
There are certain reasons to understand how to remove a motorcycle helmet visor. A few of these reasons may include cleaning purposes and fixing/replacing the visor. Moreover, knowing how to do it creates a better chance of maintaining your helmet.
The first approach to removing your helmet’s visor is to make the necessary preparations. Afterward, you might need to get the required tools like a screwdriver, the substitute visor, etc.; when these are all set, you can then remove the visor. Simply go through the guidelines in this post to properly detach the helmet’s visor.


